
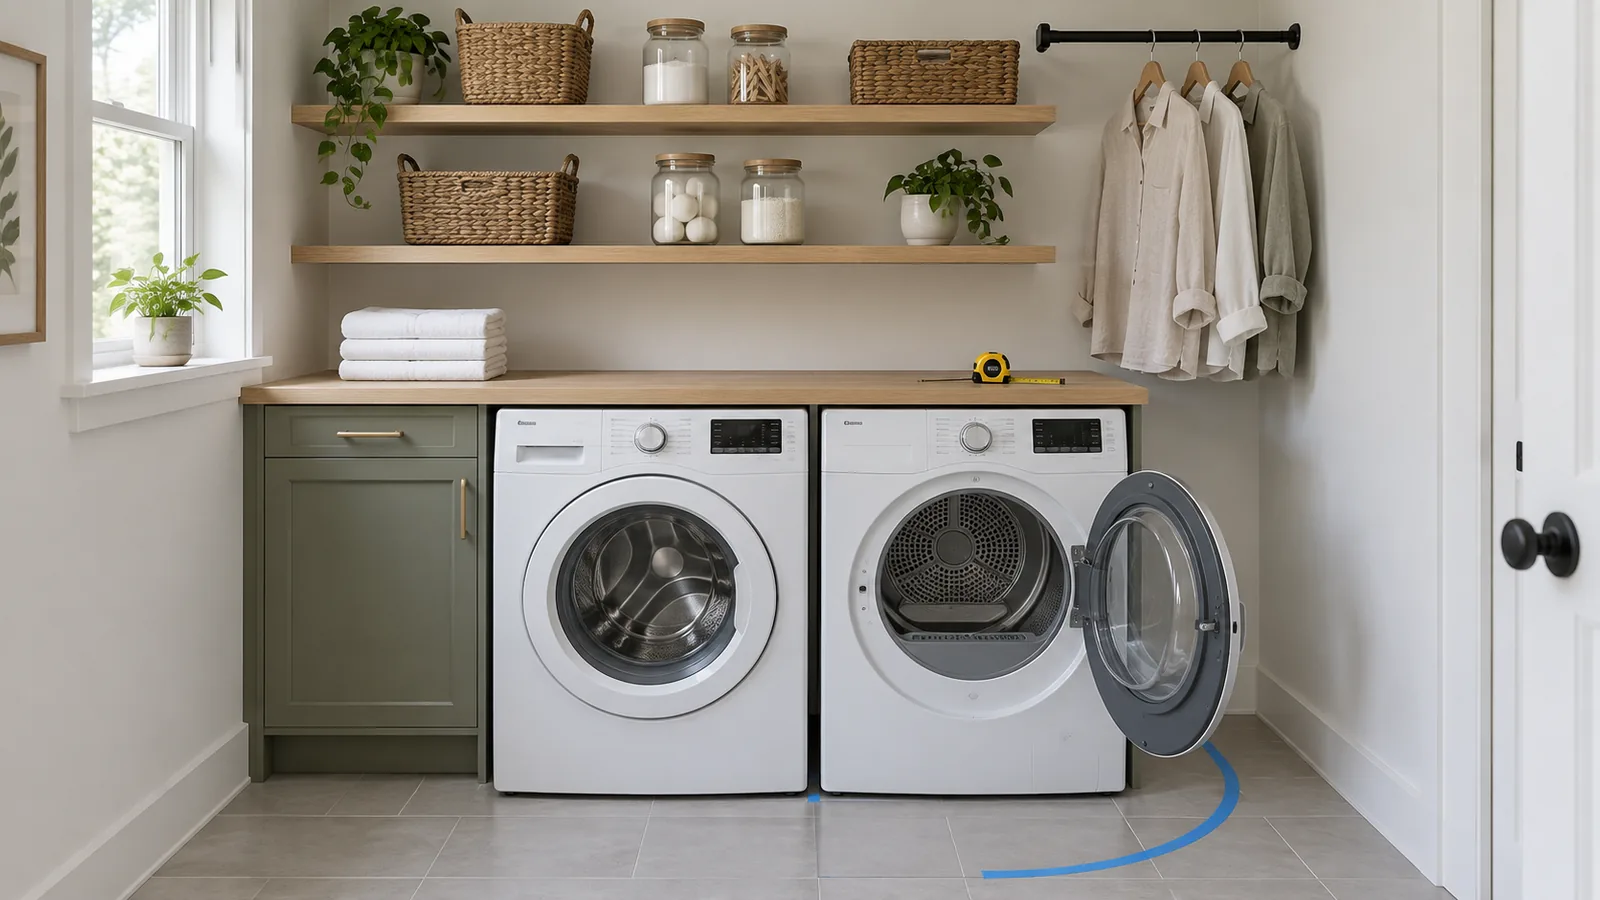
Start with the machines: typical washer and dryer dimensions
Choose the machines, or at least the machine type, before you design anything else. The catalogue footprint is only the start; what you really plan around is the space a machine needs while it is being loaded. As an example, Samsung's spec sheet for its WF45B6300 front-loader lists the washer at 27 by 38¾ by 31⅜ inches, and nearly 53 inches deep with the door open to 90 degrees.
| Machine type | Typical footprint | What to plan around |
|---|---|---|
| Full-size front-load washer or dryer | About 27 in wide, 38 to 40 in tall, 31 to 34 in deep | The door swing, which can almost double the depth you need |
| Full-size top-load washer | About 27 to 28 in wide | The open lid height; shelves above must clear it |
| Stacked front-load pair | About 27 in wide; close to 80 in tall once stacked | Ceiling height, the stacking kit, and reach to the dryer controls |
| Compact (24 in) machines | About 24 in wide | Smaller drum capacity; often stackable or under-counter |
| All-in-one washer-dryer | Usually 24 or 27 in wide | No separate dryer or outside vent, but long drying cycles |
These are typical ranges, not guarantees. Depths in particular vary by several inches between brands, and a machine's listed depth usually excludes the door and the hoses behind it. Always plan from the spec sheet for the exact model you intend to buy.
The clearances that actually matter
Beside, above, and behind the machines
For closet and alcove installations, manufacturers commonly ask for about 1 inch of air space beside each machine; Samsung's sheet above specifies 1 inch at the sides and top. Behind the machines you need room for water hoses, the drain hose, the power cord or gas line, and the dryer's transition duct. Samsung designs that washer around a 39-inch installation depth, which is a useful rule of thumb: plan on roughly 39 inches of depth for a full-size front-loader once hoses and the vent are included, then check your model.
In front of the machines
This is where most layouts go wrong. An open front-loader door needs around 21 inches beyond the face of the machine, and you need room to stand, crouch, and hold a basket beside it. We recommend 42 to 48 inches of clear floor in front of front-loaders. In a galley laundry, that is also the minimum aisle between the machines and a facing counter or cabinet.
Pay attention to which way the doors open. With the washer on the left and the dryer on the right, you want the washer hinged on the left and the dryer hinged on the right, so the doors open away from each other and the path between the drums stays clear. Many dryer doors are reversible; check before you buy.
Closet doors need air
A dryer in a closet needs replacement air, or it runs hot and slow. Whirlpool's dryer closet installation guide calls for ventilation openings in the closet door of at least 48 square inches at the top and 24 square inches at the bottom, or a louvred door with equivalent openings. Samsung's sheet states the same total differently: two unobstructed openings with a combined area of at least 72 square inches. Whirlpool also states that no other fuel-burning appliance may be installed in the same closet as a gas dryer.
Laundry layout types and the space each needs
The planning sizes below assume 27-inch full-size machines and are our estimates for comfortable use, built from the clearances above. Confirm them against your own spec sheets.
| Layout | Planning size | Works best when | Watch out for |
|---|---|---|---|
| Stacked closet | About 30 to 32 in wide and 39 to 40 in deep inside | Floor space is scarce and the ceiling is standard height or higher | Reaching the dryer controls; closet door vent openings |
| Side-by-side closet | About 57 to 60 in wide and 39 to 40 in deep inside | You want a counter over the machines | Bi-fold or sliding doors so the machine doors can open fully |
| One-wall room | 5 to 8 ft of wall plus 42 to 48 in of clear floor | A hallway alcove or narrow room | Folding space; add a counter over the machines or a wall-mounted fold-down shelf |
| Galley | Machines on one wall, counter or storage opposite, 42 to 48 in aisle | A narrow room at least 6 ft wide | Doors that clash with the facing cabinets |
| L-shape | Machines on one wall, sink or folding counter on the return | A small dedicated room | Dead corner storage; use it for hampers or a pull-out rail |
| U-shape or utility room | Counters on three sides with a 48 in centre | Large households, pets, or a mudroom combination | Overbuilding; every extra counter is more to keep clear |
Plan the layout in the order laundry moves
Laundry has a natural sequence: sort, treat, wash, dry, fold, hang, and put away. The more closely the room follows that order, the fewer times you cross it with an armful of wet clothes.
- Sorting and stain treatment sit before the washer: a divided hamper or pull-out bins, and a shelf for stain remover within reach of the sink if you have one.
- Folding belongs beside or above the dryer, on the side its door does not block. This is the single most useful surface in the room.
- Hanging goes next to the folding area: a rod or a row of hooks high enough that shirts on hangers clear the counter below.
- Storage for detergents and supplies goes above the machines but outside the path of an open top-loader lid, with the heaviest bottles on the lowest shelf.
- Drying racks for delicates work best wall-mounted or fold-down, so they disappear when not in use.
Can you put a counter over a washer and dryer?
Yes, if both machines are front-loaders and they are not on pedestals. A worktop over side-by-side machines is the most efficient folding surface you can add, but plan the height carefully. A machine that is close to 39 inches tall, plus the manufacturer's top clearance, plus the counter's own thickness puts the work surface around 41 inches or a little more, noticeably higher than a standard 36-inch kitchen counter. That is comfortable for folding standing up, but check it against the height of the person who does most of the laundry.
Make the counter removable or leave access from the front, because you will eventually need to reach the valves, hoses, and vent behind the machines. Support it on cleats or side panels rather than the machines themselves, since washers vibrate during the spin cycle. The trade-off is that a counter rules out pedestals, which lift the drum opening for less bending. Decide which matters more before you order either.
Ideas for small laundry rooms and laundry closets
- Stack the machines to halve the floor footprint, and use the width beside the stack for a slim pull-out cabinet or a narrow rolling cart.
- Swap swing doors for bi-folds, sliders, or a curtain. A swinging closet door needs clear floor of its own; bi-fold and sliding doors free that space for the machine doors. Keep the vent openings a dryer closet requires.
- Consider compact or all-in-one machines where a full-size pair will not fit. A ventless heat-pump dryer or an all-in-one unit removes the need for an outside vent, at the cost of longer cycles and a condensate drain.
- Use the wall above the machines for open shelves or cabinets, keeping the lowest shelf clear of the dryer's top clearance and any lid swing.
- Fold down, don't build out. A wall-mounted fold-down table, drying rack, or ironing board gives you surfaces only when you need them.
- Put the back of the door to work with a slim over-door organiser for supplies, as long as it does not stop the door closing over the vent openings.
Venting, plumbing, and safety
Dryer venting. A vented dryer should exhaust to the outdoors through a smooth metal duct run that is as short and straight as possible. Under the International Residential Code (section M1502), the exhaust duct is 4 inches in diameter and limited to 35 feet in length, reduced by 5 feet for every 90-degree elbow and 2.5 feet for every 45-degree elbow, unless the dryer manufacturer's instructions allow a longer run. Local codes may differ, so confirm with your building department. Long, kinked, or crushed ducts collect lint and slow drying.
Plumbing. Keep the water shut-off valves reachable without pulling out the washer. On upper floors or over finished rooms, put the washer in a drain pan connected to a drain, and consider a water-leak sensor. If you want a utility sink, place it next to the washer so it can share the supply and drain.
Electrical and gas. Laundry circuits, 240-volt dryer circuits, and gas connections are jobs for a licensed electrician or gas fitter. Plan outlets and the gas line position from the dryer's installation guide before cabinets go in.
Everyday safety. Clean the lint filter after every load, have the full vent run cleaned periodically, and do not store cardboard, laundry, or cleaning chemicals against the back of the dryer.
Floors, walls, and lighting
- Flooring should shrug off water: porcelain or ceramic tile, sheet vinyl, luxury vinyl plank, or sealed concrete. Avoid solid wood and carpet.
- Paint in a wipeable satin or semi-gloss finish, and use moisture-resistant board in rooms without a window.
- Lighting should be bright and neutral enough to spot stains before they go through the dryer. A single ceiling fixture casts shadows over the machines; add under-cabinet lights over a folding counter.
- Ventilation helps even with a vented dryer. A window or an exhaust fan keeps humidity and smells down.
If you are choosing between cabinet colours, tiles, or wallpaper, previewing options in a photo of the actual room helps you judge colour and pattern. Our guide to redesigning a room with AI without changing the layout covers how to do that, but treat any image as a colour check only. The measurements in this guide still decide what fits.
A measuring checklist before you buy
- Measure the space. Record the width, depth, and height of the niche or room, and mark the positions of doors, windows, outlets, valves, the drain, and any existing vent.
- Download the spec sheets for the exact washer and dryer models, and note width, height, depth, depth with the door open, and required clearances.
- Add up the depth: rear clearance, machine depth, open door, and 42 to 48 inches of standing room.
- Plan the dryer vent route to the outdoors and count the elbows against the allowed duct length.
- Mark the footprint on the floor with painter's tape, including the arcs of the machine doors and the closet door. Our painter's tape comparison explains why this simple step catches so many mistakes.
- Measure the delivery route: every doorway, hallway, and stair turn the machines must pass through, and the ceiling height where a stacked pair will stand.
The same approach works for any room: measure the space, then the clearances, then the objects. Our guide to planning a room layout before you buy furniture applies it to living rooms and bedrooms.