
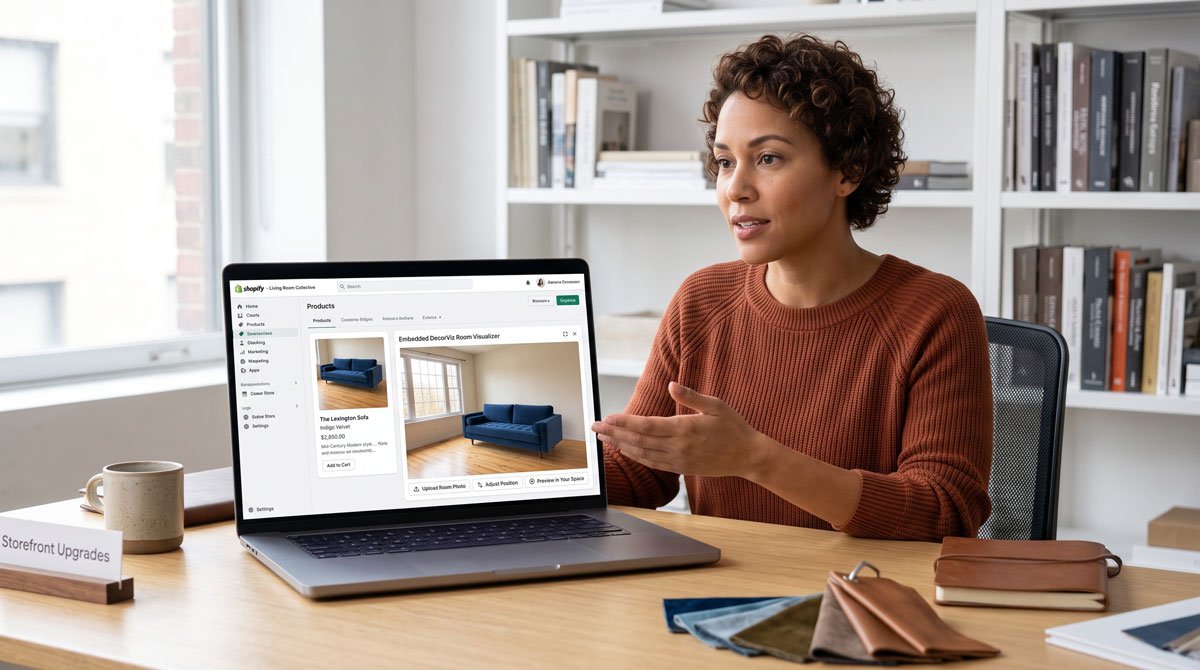
What a furniture visualizer does on a product page
A furniture visualizer lets a shopper see your product inside a photo of their own room, right on the product page. The shopper uploads a picture of their space, and the tool composites your item into it, adapted to their lighting and perspective. Instead of imagining whether your sofa is the right size or the right shade of grey, they simply see it.
The modern, low-friction version of this is photo-based rather than AR. It uses your existing product images, so there are no 3D models to build, no per-product setup, and nothing for the shopper to install. For a hands-on look at one turnkey option, see our DecorViz Storefront review.
Why add a visualizer to a furniture store
Furniture is high-consideration and high-return, and both problems share a cause: the shopper cannot tell how the piece will look in their space. A visualizer closes that gap at the moment of decision, which tends to move two numbers at once:
- Higher add-to-cart on big-ticket items. Confidence is the bottleneck on expensive, hard-to-picture pieces, and seeing it in-room supplies that confidence.
- Fewer mismatch returns. When the shopper has already seen the piece in their room, "it looked different" complaints drop.
Because a single prevented furniture return can offset a large share of the tool's cost, the break-even is low. If you want the reasoning behind why photo previews beat imagination, see home staging vs AI furniture visualizer.
What you need before you start
- Clear product photos. A photo-based tool uses the images you already have, so no 3D modeling is required.
- Access to your Shopify theme. You will add a small snippet, so you need theme edit access or a developer who has it.
- A priority list of pages. Know your highest-ticket, highest-return products so you can start where the impact is greatest.
How to add DecorViz Storefront to Shopify
The setup is deliberately light. In broad strokes:
- Create your DecorViz Storefront account and connect the store you want to enable.
- Add the snippet to your theme. Place the provided script where you want the "See in Your Room" button to appear, typically near the product gallery or add-to-cart area.
- Confirm it reads your product images. Because the tool is photo-based, it works from the product photos already on the page, with no per-product 3D setup.
- Preview on a test product. Load a product page, open the visualizer, upload a sample room photo, and confirm the composite looks right.
- Publish. Once the test page looks good, push the change live.
There is no app for shoppers to download and no account for them to create, which keeps friction low at the exact moment they are deciding.
Where to place it and how to roll out
- Start with your highest-return, highest-ticket pages. Sofas, sectionals, and beds are where confidence matters most and where a prevented return saves the most.
- Put the entry point near the buying decision. A visible "See in Your Room" button by the gallery or add-to-cart gets more use than one buried below the fold.
- Roll out to the full catalog once your pilot pages show the lift you are looking for.
What to expect and how to measure it
Give the change enough time to accumulate orders, then compare pages with the visualizer against your baseline:
- Add-to-cart and conversion rate on enabled product pages.
- Return rate on those pages, especially size, color, and style ("mismatch") returns.
- Support volume tied to "looks different than expected" complaints.
Track those three and the value of the tool becomes clear quickly. To go deeper on the tool itself before installing, read the full DecorViz Storefront review.